Amazing Allergy Free Cupcakes for Birthday Parties
I don’t think there’s a food happier than cupcakes. And friend, when you need cupcakes that are dairy-free, egg-free, gluten-free, and oil-free, these vanilla allergy free cupcakes check all the boxes while delivering delicious happiness.
Servings: 12 cupcakes
Calories: 157kcal
Ingredients
- 1½ cups gluten-free 1 to 1 flour
- 1 cup sugar (I use vegan cane sugar)
- 3 teaspoons baking powder
- ¼ teaspoon salt (I use Himalayan pink salt)
- 1 cup full-fat coconut milk (cream part only)
- ½ cup unsweetened applesauce
- 2 tablespoons water (or use the coconut liquid from can)
- 1 teaspoon vanilla extract
Instructions
- Preheat oven to 350°. Add dry ingredients to a large bowl: flour, sugar, baking powder, and salt. Stir.
- Add wet ingredients: coconut milk (cream), applesauce, water (or more coconut milk), and the vanilla. TIP: For the 1 cup of coconut milk, be sure to use just the cream part only. I do this by using a can of full-fat coconut milk that has been separated. To check this, shake your can of coconut milk-- if you don't hear it sloshing around, it's separated. Scrape out the top cream part, and use some of the extra liquid at the bottom for the 2 tablespoons of extra liquid.
- Using electric beaters, mix the batter until smooth and creamy. The batter will also start to fluff up upon standing (this is because of the baking powder).
- Divide batter between 12 baking cups. I like to use an ice cream scoop to keep it even. Your cups will be full (unlike traditional cupcakes where you fill halfway).
- Bake cupcakes for 20-22 minutes, or until a toothpick inserted comes out clean. Allow to cool completely before frosting.
Notes
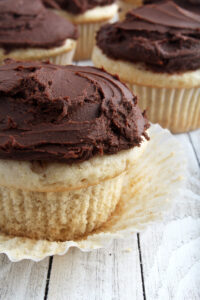
- These cupcakes are pictured frosted with this 2-ingredient chocolate ganache frosting.
- You can also frost them with this coconut frosting or this dreamy blue vegan buttercream.
- If you don’t want to use applesauce, you can always substitute with mashed banana or canned pumpkin. Just keep in mind that this will change the flavor of these cupcakes. For more on egg substitutes, check out this post. For the coconut milk, you can substitute with any plant-based milk of your choice, but remember that this may change the texture of the cupcake. I find that coconut helps act as an oil substitute + helps add moisture to these cupcakes.
- You can make these cupcakes up to two days in advance, unfrosted. Simply store the cupcakes in an air-tight container and refrigerate until ready to frost. You can frost the cupcakes the day before and then return to the fridge.
- This recipe can easily be doubled for larger parties. Just check out the button above and change the 1X button to 2X for measurements.
Tried this recipe? Let me know!Mention @bohemian.vegan.kitchen or tag #bohemianvegankitchen on Instagram so I can see your delicious creation!!
Nutrition
Calories: 157kcal | Carbohydrates: 29g | Protein: 2g | Fat: 5g | Saturated Fat: 4g | Polyunsaturated Fat: 1g | Monounsaturated Fat: 1g | Sodium: 157mg | Potassium: 50mg | Fiber: 2g | Sugar: 18g | Vitamin A: 3IU | Vitamin C: 1mg | Calcium: 73mg | Iron: 1mg